iPad
 In recent testing with iOS8 (specifically 8.0.2) we’ve discovered that any web application (in particular we’ve got a number of in house applications that were built using Visual Studio Lightswitch 2013) that relies on Windows Authentication (on Microsoft Internet Information Services) simply does not work.
In particular users get to the login prompt screen to enter their username and password and on attempting to login are just presented with the login window again with no apparent error message.
The work around for now is to use an alternative browser (Chrome works good for us), hopefully Apple will fix this annoyance soon.
Go into any school these days and it will be hard to avoid any shiny ‘iDevices’ and in support of that I have recently deployed AirServer by App Dynamic.
The installer is provided as an MSI although our retailer suggested a command line option to deploy and activate the software for all users of the PC; a very nice idea there is a much simpler method which involves a quick modification of the downloaded MSI using Orca. For the full guide take a look at the screenshot sequence below-


One point to note is that upon installation the installer will reach out to the AirServer website to perform product activation; as in most schools a web proxy will get in the way of this however if you allow unfiltered access to 168.62.26.12 the authentication will go through without any issues.
Another point to note – make sure you have all the prerequisites installed on any machine targeted for AirServer installation. The deployment of these is outside the scope of this document however the easiest way I have found so far is to download the full iTunes installer, unzip it (with 7zip) and deploy the MSIs inside it separately.
So you now have your WebDAV server setup and its time to get this out to your users. To help you along you feel free to edit the guides below to your particular requirements.
 Using Cloud - iOS (225.4 KiB, 4,354 hits)
Using Cloud - Windows Phone (196.8 KiB, 4,144 hits)
Using Cloud - Windows XP (157.4 KiB, 2,831 hits)
Using Cloud - OSX (193.4 KiB, 2,757 hits)
Using Cloud - Windows 7 (149.3 KiB, 4,022 hits)
Using Cloud - Windows Vista (166.2 KiB, 2,839 hits)
Using Cloud - Windows 8 (327.6 KiB, 2,067 hits)
Using Cloud with iWorks - iOS (5.1 MiB, 1,840 hits)
For further reading take a look at the links below-
- Basic setup of a WebDAV site on IIS.net – http://www.iis.net/learn/install/installing-publishing-technologies/installing-and-configuring-webdav-on-iis
- Basic setup of WebDAV on seanashton.net – http://seanashton.net/webdav/iis/ (some interesting reading on here about download folder and large file support)
- Using Windows authentication (instead of Basic Authentication) – http://blogs.msdn.com/b/benjaminperkins/archive/2013/08/01/setting-up-webdav-on-iis-using-windows-authentication-and-a-unc-mapped-drive-or-file-share.aspx I gave this a go when I was first setting up WebDAV but couldn’t seem to make it work all the same well worth a look.
In the previous article in this series we looked at the topology needed to setup a WebDAV infrastructure.
I’ll assume that
- You have a public DNS record which points to a IP address on your firewall which is in turn port forwarding 443 (HTTPS) to your IIS server (this also works through Web Application Proxys like the ones built into Smoothwall firewalls)
- You have a internal DNS record which points to the network adapter on your IIS server
- Your IIS server has your paid (and signed) SSL certificate imported
You will also need a few server roles installed on your IIS server (you can do this through Server Manager), these are
- Web Server (IIS)
- WebDAV Publishing
- Basic Authentication
- Request Filtering
- HTTP Logging and Logging Tools
- IIS Management Console (unless you feel like doing everything remotely)
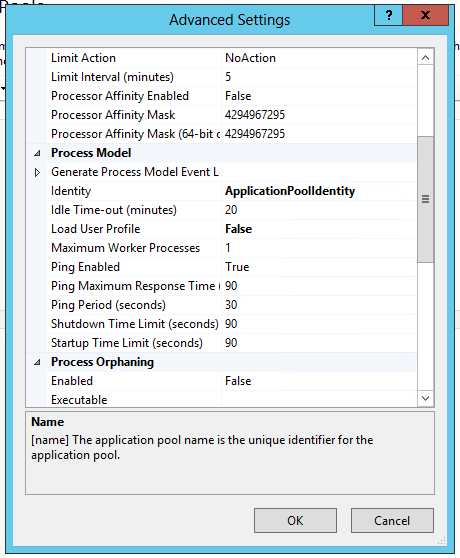
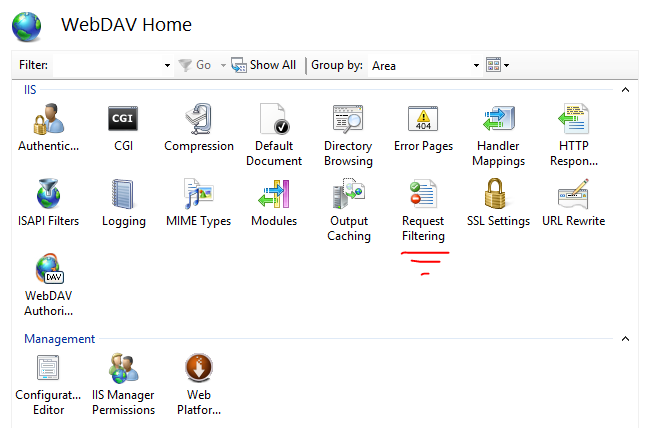
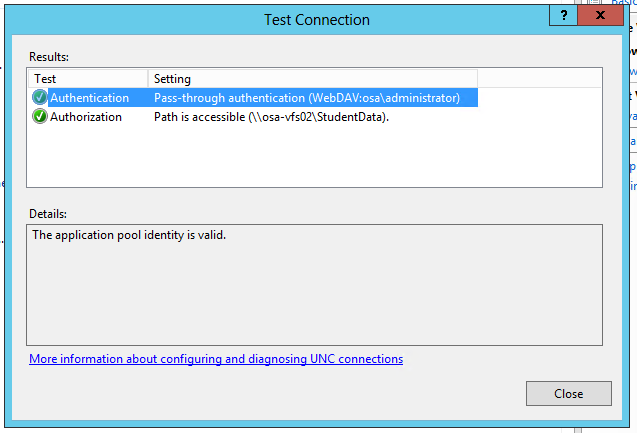
Server setup
So now to the fun bit! Which is all in the screen shot sequence below…


Testing
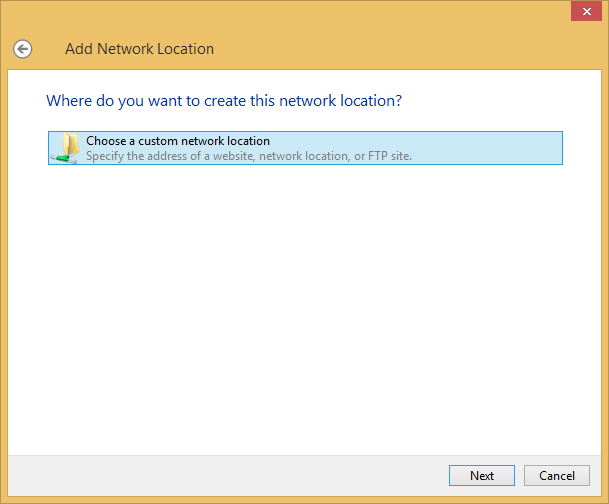
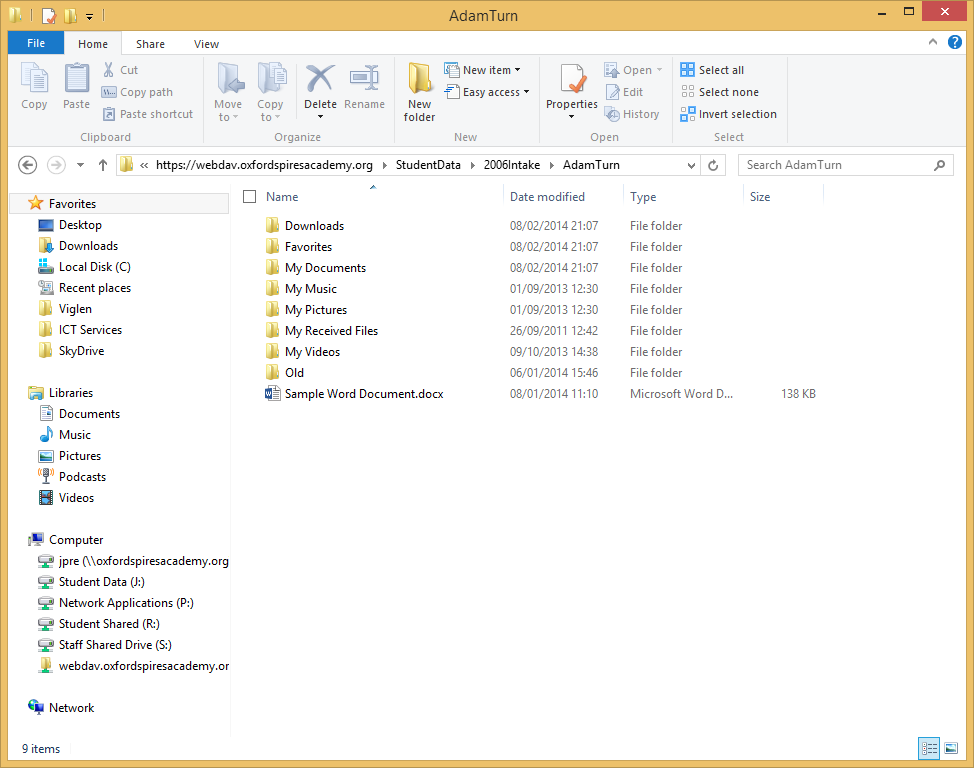
So you now have your server setup with the basics…so its time to do some testing. The screen shot sequence below shows how to connect to the WebDAV share on a Windows 8 PC.


Things you really need to test include
- Users only have permissions to access the folders you want them to
- You can upload/download files up to the maxium size you defined earlier
- That you can access the share from both inside and outside your network
Next time
In the next part you can get some example user guides that I have made for my own implementation as well as some links to further reading.
Every once in a while a magical bit of software comes along that makes life so very good; today that software is WebDAV and its been around so long that some people might have forgotten how good it is.
The premise goes
- You have one or more internal Windows Server(s) which hosts users personal documents and shared drives
- You would like your users to access these files on any device ranging from their home PC (running say Windows 7) to their personal mobile devices (iPad)
- You would like your users to access these files both inside and outside the firewall
- You would like your users to access these files natively (like a mapped drive) so they don’t have to muck around with web based applications
- You would like your users to be able to use this service with as little configuration on their part as possible
- All while maintaining a secure and auditable system
To accomplish this you will need a few things
- A valid paid for SSL certificate (don’t ever think you can get away with a self signed one) – personally I use a GoDaddy wildcard certificate
- A spare Internet Information Services (IIS) Server to host the WebDAV service on
- Depending on how things go 20 minutes
Topology
The basic topology is your clients point their WebDAV client at a DNS address which is mapped against a IP address which is port forwarded through your firewall to your IIS server which then serves requests to your file servers (clients don’t get to talk to the file servers direct). Don’t forget to setup your internal DNS to point to the internal network adapter of your IIS server as well.

Next time
In the next article I’ll run through the setup of a WebDAV server.

Has this page helped you? Was it worth the cost of a Coffee? If so click here to donate £1.80 to the myworldofit.net coffee fund via PayPal.